In this project, I wanted to pull back the curtain and show how every single render was built entirely in Blender—with no external assets. Everything was modeled by hand using real product photos as references to achieve the closest match to the real-world tools. I’m sharing these process details to give insight into the creative and technical decisions that went into making these visuals.
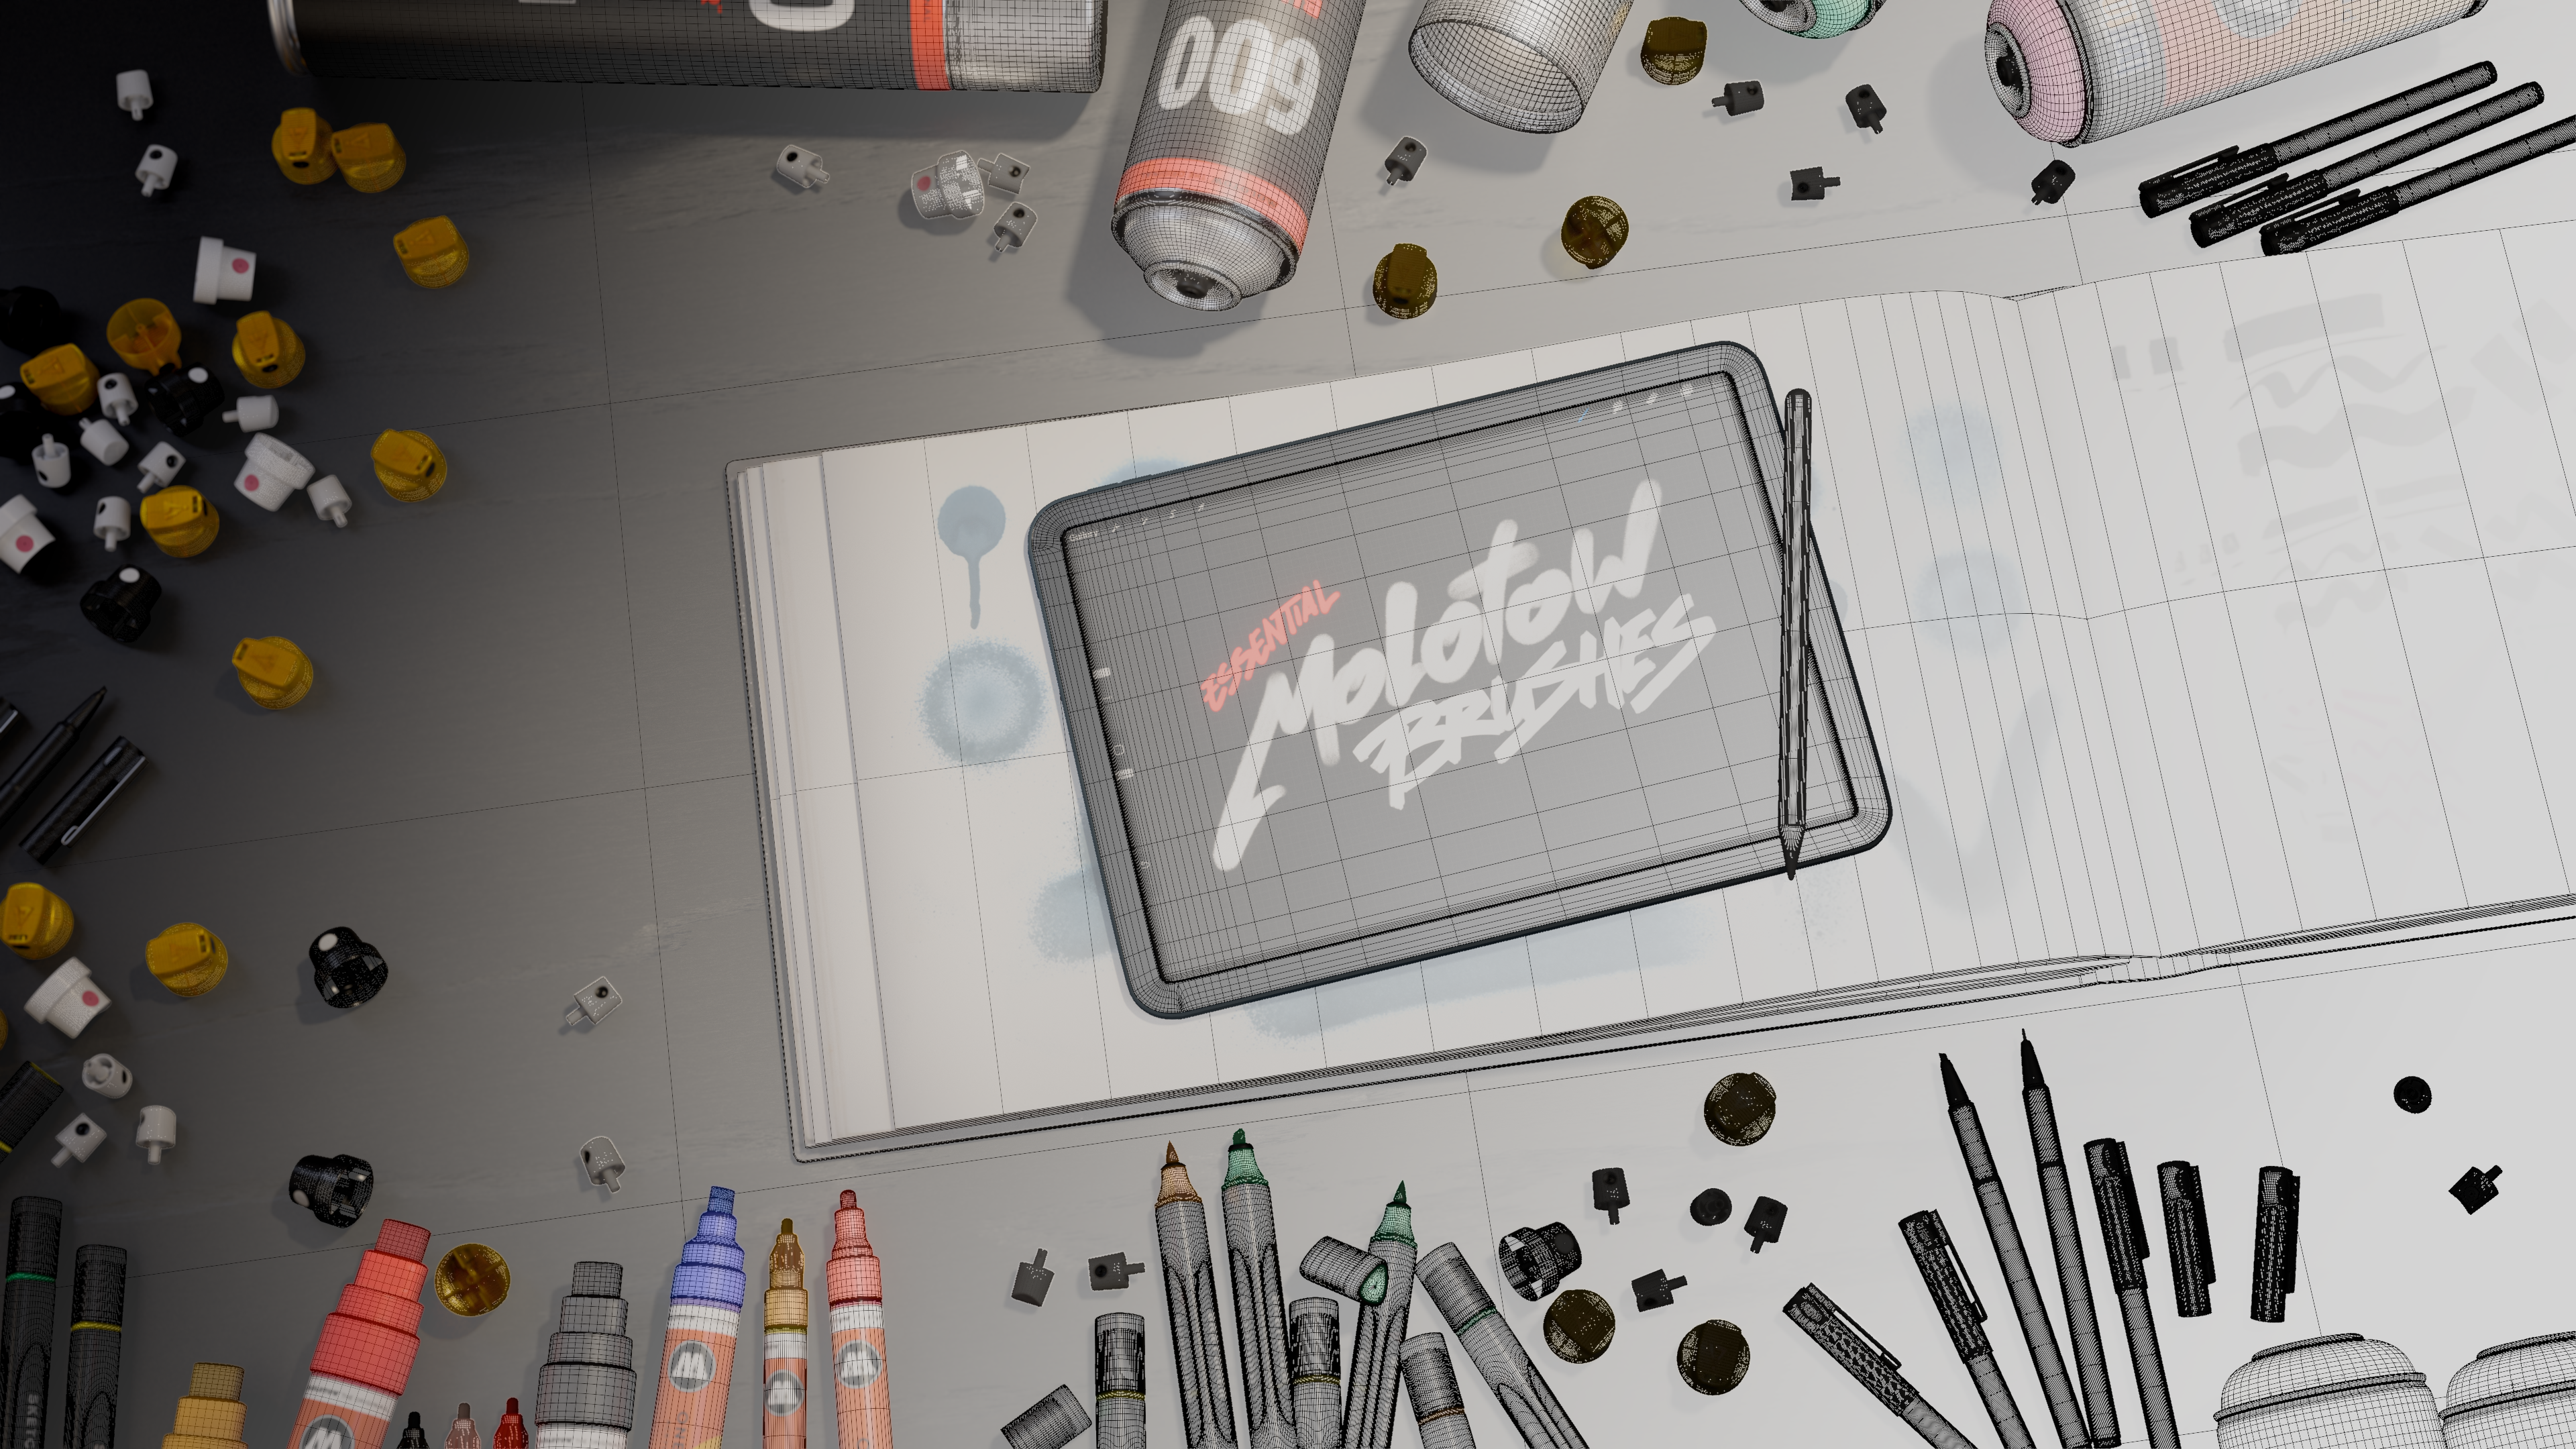
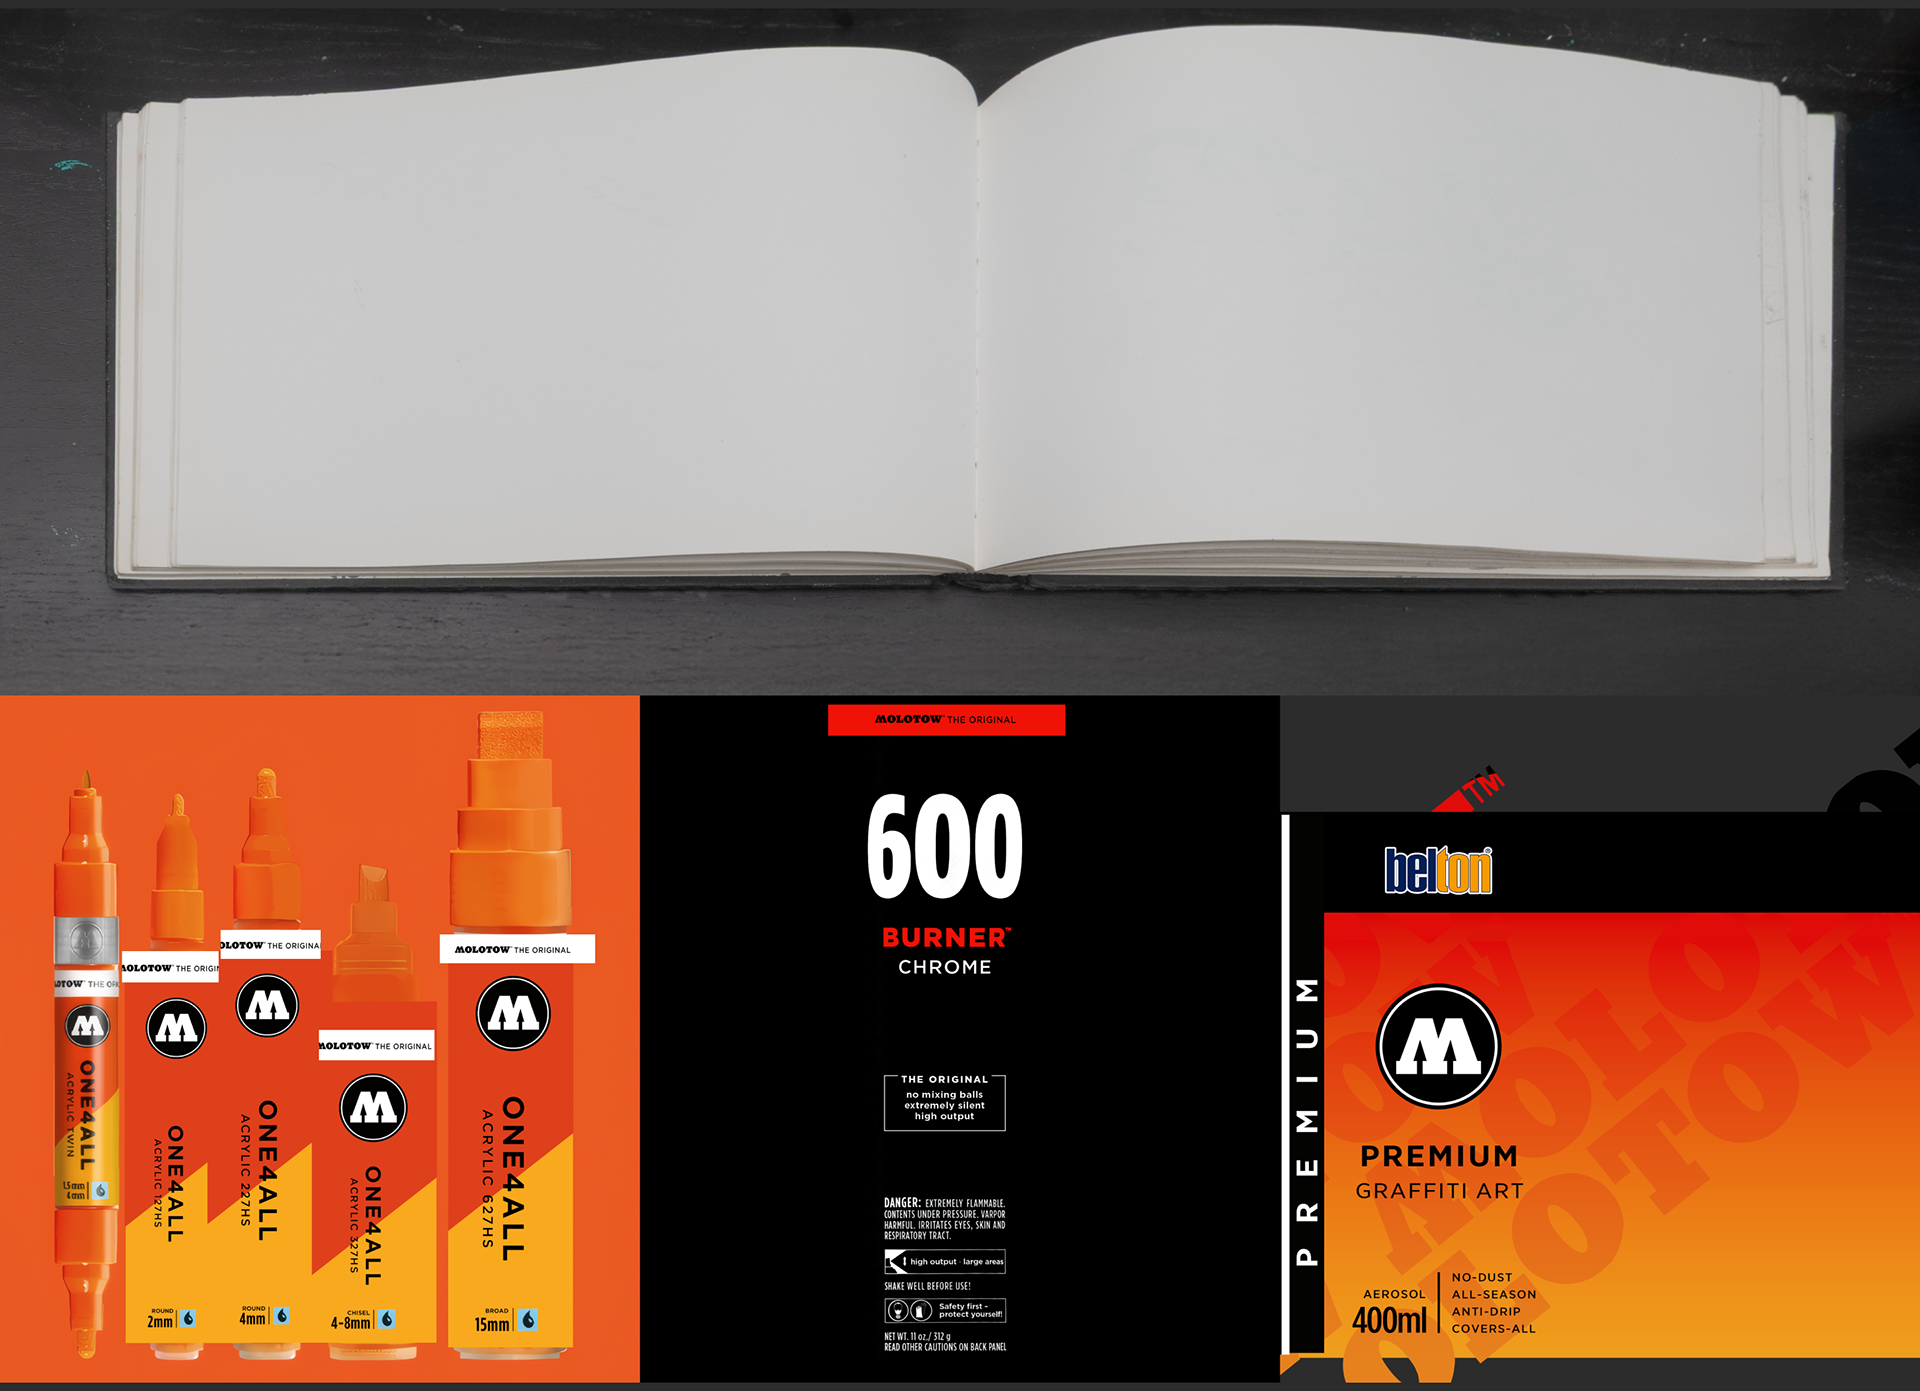
For many elements, I modeled primarily for the camera’s view. This means I focused on delivering high-detail where it really counts while keeping the geometry light enough for small adjustments. A great example is the open Blackbook: I used a photo projection rather than modeling every page, knowing that the camera will be looking at it only from this certain angle.
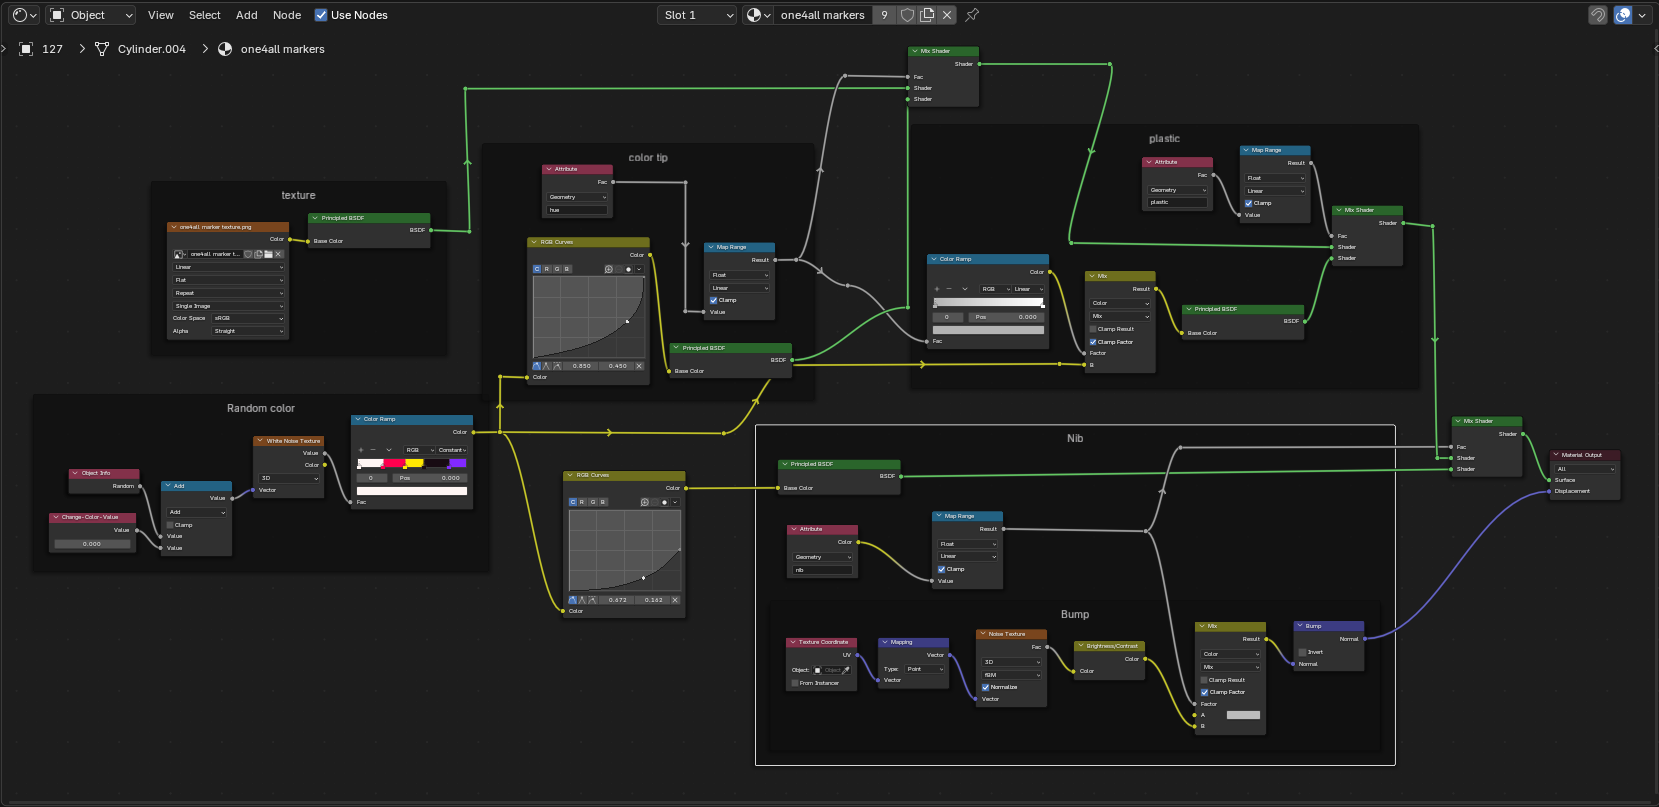
A key part of the process was blending image materials with native shaders. By using object info nodes and adjustable values this method allowed for quick exploration and provided precise control over the final look without the hassle of manual adjustments for every element. It also gave me easy controls to dynamically animate color changes for this showcase.
For the caps, I knew early on they’d be used in future projects. I dedicated extra time to ensure they were as true to the real-world as possible, designing them to work from any angle. This kind of attention to detail means the model remains flexible no matter how I scattered them around the scene.
Finally, the complete scene setup was meticulously arranged. It was all about doing maximum effort where it’s visible and simplifying what the camera doesn’t see.
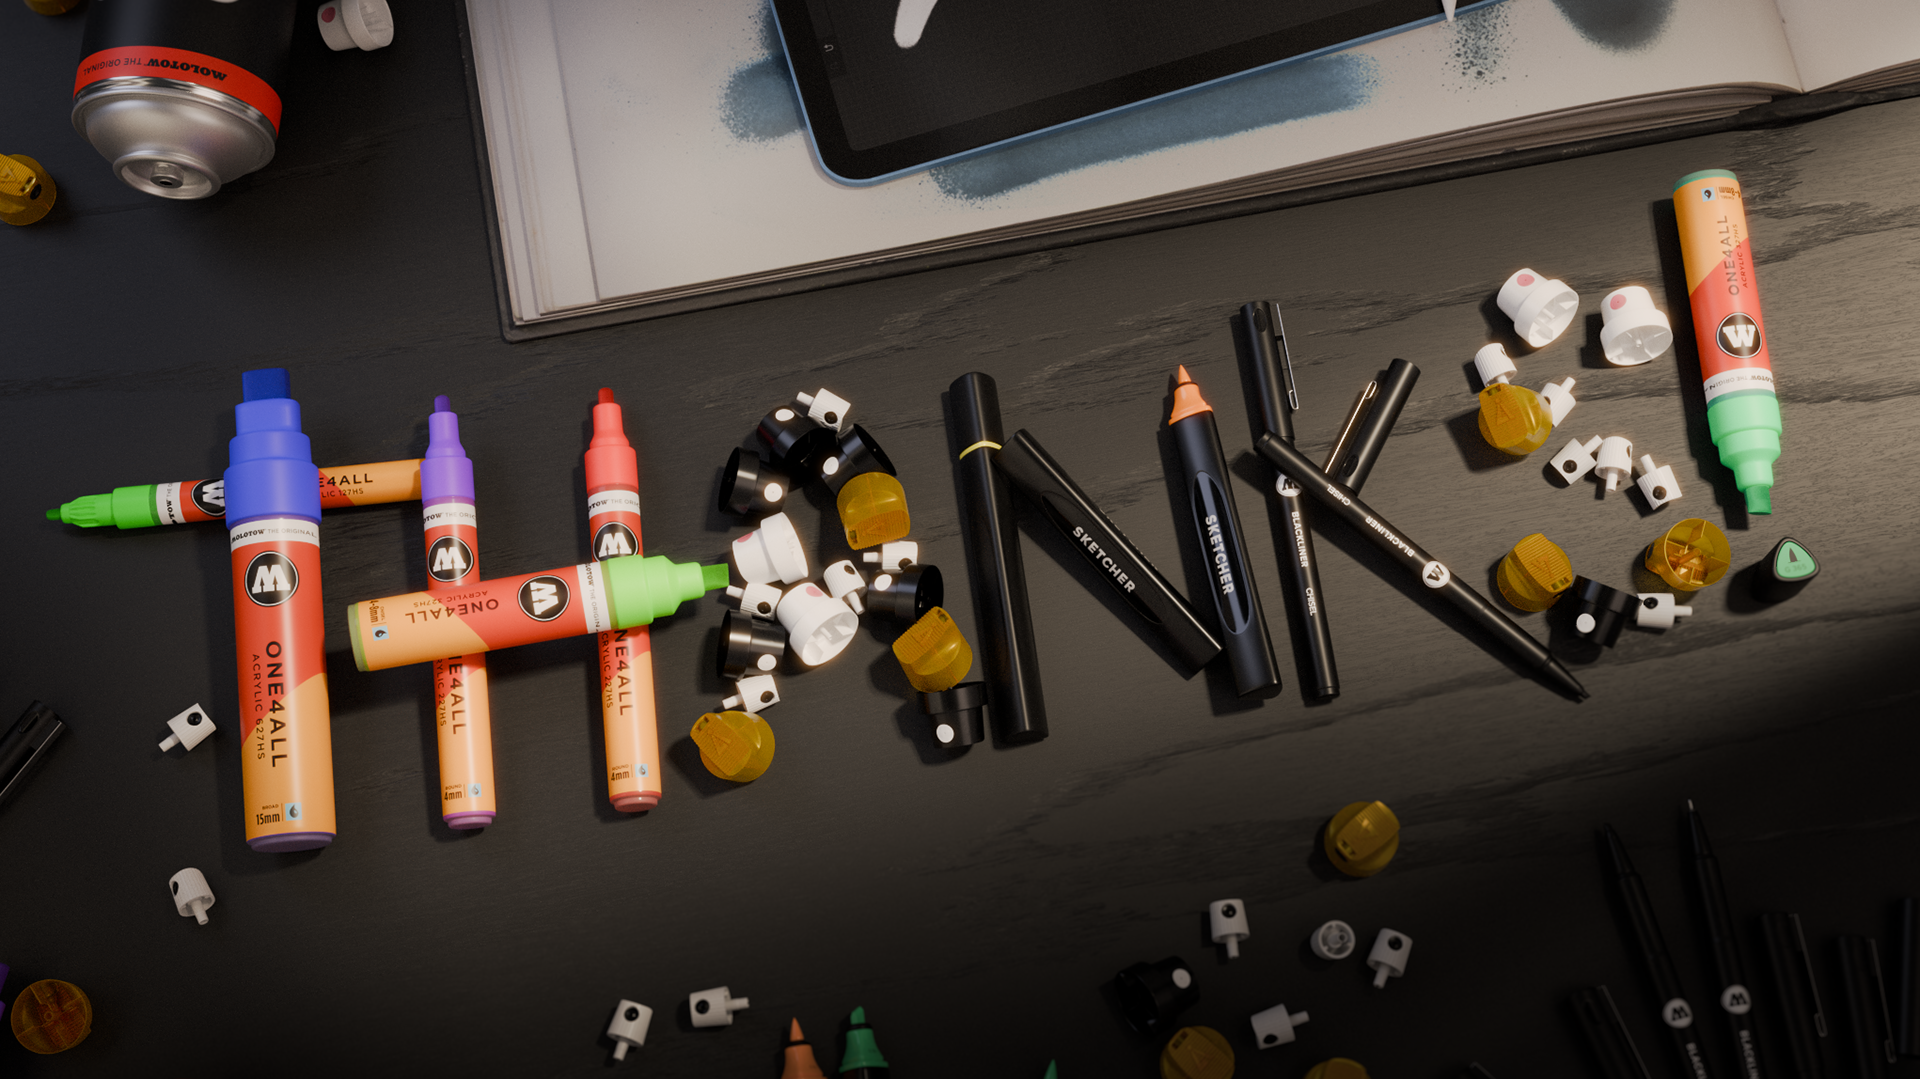
Thank you for taking the time to dive into the process behind these visuals. I hope this breakdown sparks some ideas and showcases the passion behind every detail.